Showing posts with label hair tips. Show all posts

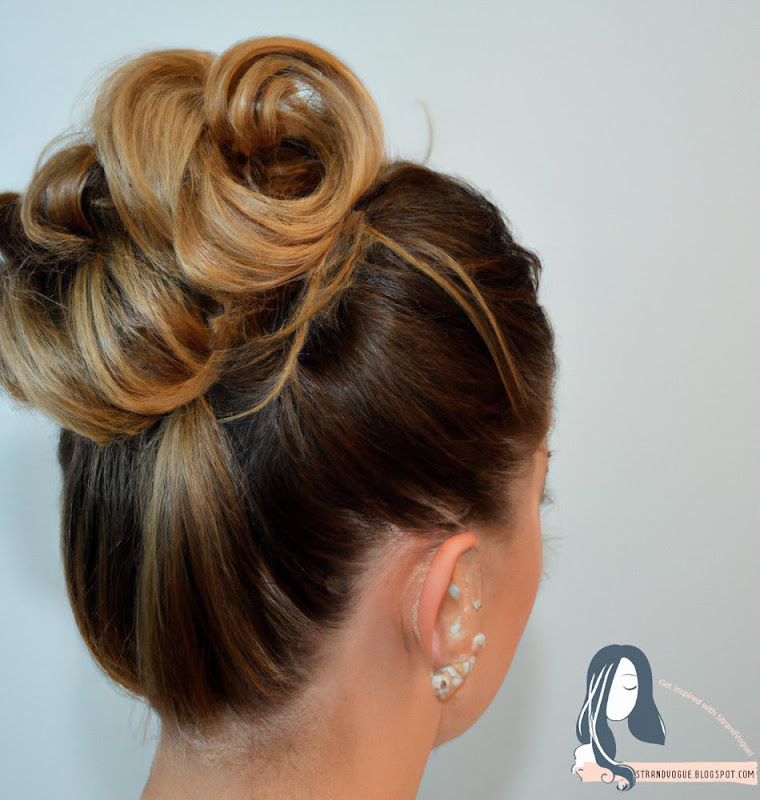
5+ Updos for Fine Hair that Look Fuller and Thicker

If you've got fine hair, you know the struggle of trying to create volume and thickness. But fear not, because there are plenty of updos that can help give your hair the illusion of fullness. Here are 5+ updos for fine hair that look fuller and thicker.

The Classic Ponytail

The ponytail is a classic hairstyle that is perfect for fine hair. To make it look fuller, start by teasing the crown of your hair with a comb. Then, gather your hair into a high ponytail and secure it with an elastic band. For an extra boost of volume, pull out a few strands of hair around your face.

The Messy Bun

The messy bun is another great option for fine hair. Start by pulling your hair into a high ponytail, and then twist it into a bun. Secure it with bobby pins, leaving a few strands of hair loose to create a messy look. This style looks great with a few face-framing pieces left out.

The Braided Crown

The braided crown is a beautiful and sophisticated style that can create the illusion of thicker hair. Start by braiding two small sections of hair on either side of your head. Pull them back and secure them with bobby pins, crossing them over each other to create a crown-like effect.

The Half-Up, Half-Down

The half-up, half-down style is a simple yet effective way to create volume in fine hair. Start by pulling the top half of your hair back and securing it with a clip. You can leave it straight, or add some curls or waves for extra texture. This style looks great with a few face-framing pieces left out.

The Twisted Updo

The twisted updo is a chic and elegant style that can make fine hair look thicker. Start by twisting small sections of hair and pinning them at the back of your head. Keep adding more twisted sections until all of your hair is up. This style looks great with a few face-framing pieces left out.

The Fishtail Braid

The fishtail braid is a beautiful and intricate style that can create the illusion of thicker hair. Start by pulling your hair to one side and dividing it into two sections. Take a small piece of hair from the outside of the first section and cross it over to the inside of the second section. Repeat on the other side, and continue until you reach the end of your hair.In conclusion, there are plenty of updos for fine hair that can create the illusion of fullness and thickness. From the classic ponytail to the intricate fishtail braid, there's a style for every occasion. Experiment with these styles to find the one that works best for you and your hair type.

The Ultimate Guide to Braided Hairstyles for Every Occasion

Braided hairstyles are a versatile and elegant choice for any occasion. Whether you're attending a formal event, going on a date, or just running errands, a braided hairstyle can elevate your look and make you feel confident and put together. In this ultimate guide, we'll explore different types of braids and how to create them, as well as tips for maintaining and styling braided hair.


Types of Braids


There are countless types of braids, each with their own unique look and level of difficulty. Some of the most popular braids include:


Fishtail Braid


The fishtail braid is a classic style that is perfect for a casual day out or a night on the town. To create a fishtail braid, divide your hair into two sections and take a small piece of hair from the outside of the left section, cross it over the top, and add it to the right section. Then, take a small piece of hair from the outside of the right section, cross it over the top, and add it to the left section. Continue alternating sides until you reach the end of your hair.


Dutch Braid


The Dutch braid, also known as an inverted French braid, is a stunning style that is perfect for formal events. To create a Dutch braid, start at the top of your head and divide your hair into three sections. Cross the right section under the middle section, then cross the left section under the middle section. Next, add a small section of hair to the right section, then cross it under the middle section. Repeat on the left side, adding hair to the left section and crossing it under the middle section. Continue this pattern until you reach the nape of your neck, then finish with a regular three-strand braid.


Crown Braid


The crown braid is a regal and elegant style that is perfect for weddings and other formal events. To create a crown braid, part your hair down the middle and create two Dutch braids, starting at the nape of your neck and working up towards the crown of your head. Once you reach the crown, continue braiding the two sections of hair together to create a single braid. Finish by tucking the end of the braid under the crown and securing it with bobby pins.


Tips for Maintaining and Styling Braided Hair


Once you've created your braided hairstyle, it's important to maintain and style it properly in order to keep it looking its best. Here are some tips to help you get the most out of your braids:

- Use a high-quality hairbrush or comb to gently detangle your hair before braiding.
- Apply a small amount of leave-in conditioner or hair oil to the ends of your hair to prevent frizz and breakage.
- When braiding, use small sections of hair for a more intricate look, or larger sections for a more relaxed look.
- For added texture and volume, gently pull on the edges of the braid to loosen it after securing it with a hair tie or bobby pins.
- To keep your braids looking fresh, sleep with a silk or satin pillowcase to prevent frizz and damage.


Conclusion


Braided hairstyles are a timeless and versatile choice for any occasion. Whether you're looking for a simple and casual style, or a more intricate and formal look, there's a braided hairstyle out there for you. By following these tips and techniques, you can create beautiful braids that will turn heads and make you feel confident and stylish.

How to Create a Perfect Ponytail for School

As a student, it is important to have a quick and easy hairstyle for school that is also stylish and presentable. One of the most popular hairstyles for students is the ponytail. However, creating the perfect ponytail can be a challenge for some. In this article, we will provide you with a step-by-step guide on how to create a perfect ponytail for school.


Step 1: Brush your hair


Before creating your ponytail, make sure to brush your hair thoroughly to remove any tangles or knots. This will ensure that your ponytail is smooth and neat.


Step 2: Decide on the placement of your ponytail


Decide where you want your ponytail to be placed. A high ponytail will give you a more formal look, while a low ponytail will give you a more casual look. You can also choose to have your ponytail in the middle of your head for a classic look.


Step 3: Secure your ponytail


Once you have decided on the placement of your ponytail, gather your hair with your hands and secure it with an elastic band. Make sure to pull the elastic band tightly to ensure that your ponytail stays in place.


Step 4: Add some volume


To add some volume to your ponytail, use a comb to tease the hair at the crown of your head. This will give your ponytail a fuller look.


Step 5: Hide the elastic band


To hide the elastic band, take a small section of hair from the bottom of your ponytail and wrap it around the elastic band. Secure the end of the section with a bobby pin.
And there you have it – a perfect ponytail for school! This hairstyle is quick, easy, and stylish. With these simple steps, you can create a ponytail that will keep you looking great throughout the school day.

The Best Half-Up Hairstyles for Weddings and Special Occasions

Choosing the perfect hairstyle for a special occasion can be a daunting task. There are so many options out there, but half-up hairstyles are a timeless classic that never goes out of style. They are the perfect mix of classic and modern, and can be customized to fit any hair type or face shape. In this article, we will discuss some of the best half-up hairstyles for weddings and special occasions.


The Braided Half-Up


One of the most popular half-up hairstyles for weddings and special occasions is the braided half-up. This style is perfect for those with long hair, and can be customized with different types of braids. A classic French braid or a fishtail braid can add texture and depth to the style. For those with shorter hair, adding in hair extensions can help achieve this look.


The Twisted Half-Up


Another great option for a half-up hairstyle is the twisted half-up. This style is perfect for those with medium to long hair, and can be achieved by twisting sections of hair and securing them at the back of the head. The twists can be made loose or tight, depending on the desired look. This style works best with hair that has some texture or wave to it.


The Curly Half-Up


For those with naturally curly hair, a curly half-up hairstyle can be a stunning option for a special occasion. This style involves leaving the curls down, and pulling back a section of hair at the front and securing it with bobby pins or a hair accessory. This style is perfect for those who want to show off their natural curls and add some volume to their hair.


The Boho Half-Up


If you're going for a more bohemian vibe, a boho half-up hairstyle may be the perfect fit. This style involves leaving the hair down and loosely braiding a section of hair on either side of the head. The braids are then pulled back and secured in the middle with a hair tie or accessory. This style is perfect for those with longer hair and can be customized with different types of braids.


The Simple Half-Up


For those who prefer a more simple and classic look, a simple half-up hairstyle may be the perfect fit. This style involves pulling back a section of hair at the front and securing it with bobby pins or a hair accessory. This style is perfect for those with shorter hair or for those who prefer a more minimalistic look.

In conclusion, half-up hairstyles are a versatile and timeless option for weddings and special occasions. Whether you prefer a braided, twisted, curly, boho, or simple half-up style, there is a perfect option out there for everyone. By choosing the right hairstyle, you can feel confident and beautiful on your special day.

The Dos and Don'ts of Achieving Beachy Waves

  No comments    
categories: , , , ,
If you're looking for a low-maintenance, effortless hairstyle, beachy waves are the perfect choice. But achieving the perfect beachy waves can be tricky. Here are some dos and don'ts to keep in mind when trying to achieve that perfect beachy wave look.


Do use a sea salt spray


A sea salt spray is a must-have when it comes to achieving beachy waves. It helps to add texture and volume to your hair while also creating that tousled, beachy look. Simply spray it on damp hair and scrunch your hair with your hands to create waves.


Don't use too much heat


Using too much heat on your hair can damage it and make it look dry and brittle. While it may be tempting to use a curling iron or straightener to create beachy waves, it's best to avoid excessive heat. Instead, try using a hair dryer on a low heat setting to create natural-looking waves.


Do use a diffuser


If you're using a hair dryer to create beachy waves, it's important to use a diffuser attachment. A diffuser helps to distribute heat evenly throughout your hair, reducing the risk of damage and creating soft, natural-looking waves.


Don't forget to moisturize


One of the biggest mistakes people make when trying to achieve beachy waves is forgetting to moisturize their hair. Salt spray and heat can dry out your hair, so it's important to use a moisturizing conditioner or hair mask to keep your hair healthy and hydrated.


Do use the right technique


When creating beachy waves, it's important to use the right technique. Start by sectioning your hair into small sections and twisting each section away from your face. Then, use a hair dryer or let your hair air dry to create natural-looking waves.


Don't overdo it


While beachy waves are meant to look effortless, it's important not to overdo it. Too much product or too much twisting can make your hair look messy and tangled. Keep it simple and natural-looking for the best results.

Achieving beachy waves can be easy if you follow these dos and don'ts. Remember to use a sea salt spray, avoid excessive heat, use a diffuser, moisturize your hair, use the right technique, and don't overdo it. With a little practice, you'll be able to achieve the perfect beachy wave look in no time.

How to make your ponytail look fuller and thicker

A ponytail is a classic hairstyle that is versatile and easy to create. However, sometimes you may feel like your ponytail looks limp and lackluster. Don't worry; there are simple tricks you can do to make your ponytail look fuller and thicker. Here are some tips to help you achieve the perfect ponytail.


1. Tease your hair


One of the easiest ways to add volume to your ponytail is by teasing your hair. To do this, take a small section of hair at the crown of your head and comb it backward towards your scalp. Repeat this process with several sections of hair, focusing on the top and sides of your head. Once you have teased your hair, smooth it out with a brush and gather it into a ponytail.


2. Use a hair extension


Another way to make your ponytail look fuller is by using a hair extension. There are many types of hair extensions available, including clip-ins and tape-ins. Choose an extension that matches your hair color and texture, and clip it onto the base of your ponytail. This will add both length and volume to your ponytail.


3. Add hair accessories


Hair accessories are a great way to add volume and texture to your ponytail. Try using a scrunchie or a hair tie made of a thicker material to hold your ponytail in place. You can also use a headband or a ribbon to wrap around your ponytail and create a more voluminous look.


4. Curl your hair


Curling your hair is another way to make your ponytail look fuller and thicker. Use a curling iron or a set of hot rollers to create loose curls throughout your hair. Once you have curled your hair, gather it into a ponytail and let the curls cascade down your back. This will add volume and texture to your ponytail, making it look fuller and more voluminous.


5. Use volumizing hair products


Finally, using the right hair products can make all the difference when it comes to creating a fuller and thicker ponytail. Look for volumizing shampoos and conditioners that will add body and texture to your hair. You can also use a volumizing mousse or spray to give your hair extra lift and hold.

With these simple tips, you can create a fuller and thicker ponytail that will turn heads wherever you go. Whether you're heading to work or going out for a night on the town, a voluminous ponytail is a stylish and easy-to-create hairstyle that will never go out of fashion.