Showing posts with label styling. Show all posts

The Ultimate Guide to Hairstyles for Greasy Hair

  No comments    
categories: , , , ,
Greasy hair can be a real struggle, especially if you are someone who struggles with oily hair on a regular basis. It can make you feel unclean and unattractive, which can take a toll on your confidence. However, there are many hairstyles that can help you to deal with greasy hair and look great at the same time. In this article, we will discuss some of the best hairstyles for greasy hair.


The Top 5 Hairstyles for Greasy Hair


1. The High Ponytail - This is a classic hairstyle that can work wonders for greasy hair. It’s easy to do and can be done in a matter of minutes. Simply pull your hair back into a high ponytail and secure it with a hair tie. You can also add some volume to your ponytail by backcombing the hair at the crown of your head.

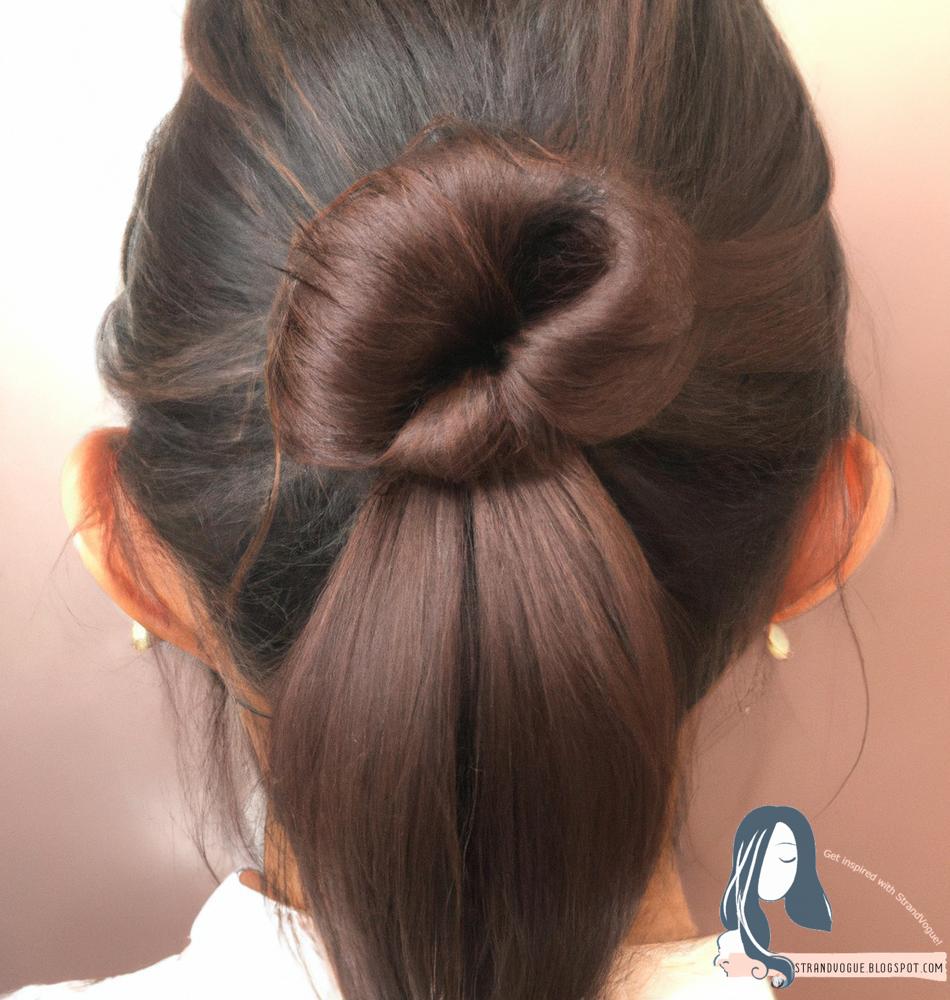
2. The Top Knot - Another great hairstyle for greasy hair is the top knot. This hairstyle is perfect for those days when you just don’t have time to wash your hair. Simply pull your hair back into a high ponytail and twist it into a knot. Secure it with bobby pins and you’re good to go!

3. The Messy Bun - If you’re looking for a hairstyle that’s both stylish and practical, the messy bun is a great choice. This hairstyle is perfect for those days when you want to look put together, but don’t have time to spend hours styling your hair. Simply pull your hair back into a bun and secure it with bobby pins.

4. The Side Braid - The side braid is another great hairstyle for greasy hair. It’s easy to do and can be done in a matter of minutes. Simply pull your hair to one side and braid it. You can also add some volume to your braid by backcombing the hair at the crown of your head.
5. The Low Ponytail - The low ponytail is another classic hairstyle that’s perfect for greasy hair. Simply pull your hair back into a low ponytail and secure it with a hair tie. You can also add some volume to your ponytail by backcombing the hair at the crown of your head.


Other Tips for Dealing with Greasy Hair


In addition to these hairstyles, there are several other tips that can help you to deal with greasy hair:

- Use a dry shampoo to absorb excess oil and refresh your hair between washes
- Avoid using too many styling products, as they can make your hair look greasier
- Wash your hair regularly, but not too often as this can strip your hair of its natural oils
- Use a clarifying shampoo once a week to remove buildup and refresh your hair
- Avoid touching your hair too much, as this can transfer oil from your hands to your hair

By following these tips and trying out these hairstyles, you can effectively deal with greasy hair and look great at the same time.

10 Hairstyles That Are Perfect for Greasy Hair

  No comments    
categories: , , , ,
Greasy hair can be a real problem, especially when you're short on time and can't wash your hair. Fortunately, there are some hairstyles that are perfect for greasy hair. These hairstyles not only look great but also help you hide your greasy hair. In this article, we'll be discussing 10 hairstyles that are perfect for greasy hair.


1. Sleek Top Knot


A sleek top knot is a great hairstyle for greasy hair. Simply gather all of your hair on top of your head and twist it into a tight bun. Secure it with bobby pins and you're good to go. This hairstyle not only hides your greasy hair but also looks chic and stylish.


2. Braided Crown


A braided crown is another great hairstyle for greasy hair. Simply braid two sections of hair on either side of your head and secure them with bobby pins at the back of your head. This hairstyle not only hides your greasy hair but also looks elegant and sophisticated.


3. Messy Bun


A messy bun is a classic hairstyle that is perfect for greasy hair. Simply gather all of your hair on top of your head and twist it into a loose bun. Pull out a few strands of hair to create a messy look. This hairstyle not only hides your greasy hair but also looks trendy and effortless.


4. Low Ponytail


A low ponytail is a simple yet stylish hairstyle for greasy hair. Simply gather all of your hair at the nape of your neck and secure it with a hair tie. Pull out a few strands of hair to create a messy look. This hairstyle not only hides your greasy hair but also looks sleek and sophisticated.


5. Half-Up Half-Down


A half-up half-down hairstyle is a versatile hairstyle that is perfect for greasy hair. Simply gather the top section of your hair and secure it with a hair tie. Leave the rest of your hair down. This hairstyle not only hides your greasy hair but also looks cute and playful.


6. French Twist


A French twist is a classic hairstyle that is perfect for greasy hair. Simply gather all of your hair at the nape of your neck and twist it upwards. Secure it with bobby pins at the back of your head. This hairstyle not only hides your greasy hair but also looks elegant and sophisticated.


7. Side Braid


A side braid is a simple yet stylish hairstyle for greasy hair. Simply gather all of your hair on one side of your head and braid it downwards. Secure it with a hair tie at the end. This hairstyle not only hides your greasy hair but also looks trendy and chic.


8. Ballerina Bun


A ballerina bun is a classic hairstyle that is perfect for greasy hair. Simply gather all of your hair on top of your head and twist it into a tight bun. Secure it with bobby pins and hairspray to keep it in place. This hairstyle not only hides your greasy hair but also looks elegant and sophisticated.


9. Twisted Ponytail


A twisted ponytail is a unique and stylish hairstyle for greasy hair. Simply gather all of your hair at the nape of your neck and twist it upwards. Secure it with a hair tie and leave the rest of your hair down. This hairstyle not only hides your greasy hair but also looks trendy and chic.


10. Messy Side Bun


A messy side bun is a cute and playful hairstyle for greasy hair. Simply gather all of your hair on one side of your head and twist it into a loose bun. Pull out a few strands of hair to create a messy look. This hairstyle not only hides your greasy hair but also looks trendy and stylish.

image of woman with a messy side bun

Conclusion
Greasy hair can be a real problem, but with these 10 hairstyles, you can easily hide your greasy hair and look great at the same time. From sleek top knots to messy buns, these hairstyles are perfect for any occasion and will help you feel confident and stylish. So the next time you're dealing with greasy hair, try out one of these hairstyles and see the difference for yourself.

The Best Products for Achieving the Perfect Messy Bun

  No comments    
categories: , , , ,


Introduction


The messy bun has been a popular hairstyle for years. It's effortless, chic, and perfect for any occasion. However, achieving the perfect messy bun can be challenging. You want it to look undone, yet put together at the same time. That's where the right products come in. In this article, we'll be discussing the best products for achieving the perfect messy bun.


Hair Ties


The first and most important product you need for a messy bun is a hair tie. However, not all hair ties are created equal. You want a hair tie that will hold your hair in place without causing any damage or leaving any creases. We recommend using a scrunchie or a spiral hair tie. These types of hair ties are gentle on your hair and won't leave any creases.


Dry Shampoo


Another essential product for achieving the perfect messy bun is dry shampoo. Dry shampoo helps to absorb excess oil and add volume to your hair, making it easier to style. We recommend using a dry shampoo that is lightweight and won't leave any residue. Apply the dry shampoo to your roots and massage it in before styling your hair.


Texture Spray


To add some texture and hold to your messy bun, we recommend using a texture spray. Texture spray helps to give your hair some grip, making it easier to style and hold in place. Spray the texture spray throughout your hair before styling your messy bun.


Hair Pins


Once you've styled your messy bun, you'll need some hair pins to keep it in place. We recommend using bobby pins or hair pins that match your hair color. This will help to keep your messy bun looking natural and effortless. Use the hair pins to secure any loose ends or pieces that are sticking out.


Hairspray


Finally, to set your messy bun in place, you'll need some hairspray. We recommend using a lightweight hairspray that won't weigh your hair down or make it look stiff. Hold the hairspray about 10 inches away from your head and spray it all over your messy bun.


Conclusion


Achieving the perfect messy bun is all about using the right products. With the help of a hair tie, dry shampoo, texture spray, hair pins, and hairspray, you can create a messy bun that looks effortless and chic. Remember to always choose products that are gentle on your hair and won't cause any damage. With these products in your arsenal, you'll be able to achieve the perfect messy bun every time.

The Ultimate Guide to Perfecting Your Messy Bun

  No comments    
categories: , , , ,
If you're someone who is always on the go and looking for an easy yet stylish hairstyle, then the messy bun is the perfect option for you! Not only is it effortless to create, but it's also a versatile look that can be worn on any occasion. In this guide, we'll be discussing some tips and tricks that will help you perfect your messy bun and make it look like it was done by a professional hairstylist.


1. Start with Second-Day Hair


One of the best ways to achieve the perfect messy bun is by starting with second-day hair. This is because freshly washed hair tends to be too soft and slippery, making it difficult to style. Second-day hair has the perfect amount of texture and grip, which makes it easier to create a messy bun that will stay in place all day long.


2. Use the Right Tools


To create a perfect messy bun, you'll need a few essential tools. These include a hair tie, bobby pins, and a comb. You may also want to use some hair spray or texturizing spray to add some extra hold and volume to your hair.


3. Decide on the Placement of Your Bun


Before you start creating your messy bun, you need to decide on the placement of your bun. You can choose to place it high on your head, low at the nape of your neck, or somewhere in between. Once you've decided on the placement, gather all of your hair at that point and secure it with a hair tie.


4. Create a Messy Base


To create the perfect messy bun, you need to start by creating a messy base. This can be done by teasing your hair with a comb or using a texturizing spray to add some volume and texture. Once you've created a messy base, use your fingers to gently pull and twist your hair into a bun shape.


5. Secure Your Bun with Bobby Pins


Once you've created your messy bun, it's time to secure it in place with bobby pins. Start by inserting the pins into the base of your bun, making sure to criss-cross them for extra hold. You can also use some hairspray to keep your bun in place.


6. Pull Out Some Strands of Hair


To give your messy bun a more effortless and natural look, pull out some strands of hair around your face and ears. This will soften the look of your bun and make it look more relaxed.


7. Finish with Hairspray


Finally, finish off your messy bun by spraying some hairspray all over your hair. This will help to keep your bun in place all day long and prevent any flyaways.

With these tips and tricks, you can create the perfect messy bun that will have everyone thinking you just stepped out of a salon. Remember to experiment with different placements and styles to find the perfect messy bun that works for you!

The Dos and Don'ts of Maintaining Your Bangs Hairstyle

  No comments    
categories: , , , ,
Bangs are a popular hairstyle that can add a touch of style and personality to any look. However, maintaining bangs can be a challenge, especially if you are new to this hairstyle. In this article, we will discuss the dos and don'ts of maintaining your bangs hairstyle.


The Dos:


1. Trim Your Bangs Regularly


One of the most important things you can do to maintain your bangs hairstyle is to trim them regularly. This will help keep them looking neat and prevent them from becoming too long or uneven. If you are not confident in trimming your own bangs, be sure to visit a professional stylist to ensure they are cut properly.


2. Use a Quality Hairbrush


Using a quality hairbrush can make a big difference in maintaining your bangs. A good brush will help you style your bangs easily and prevent them from becoming tangled or frizzy. Choose a brush with soft bristles that are gentle on your hair and scalp.


3. Choose the Right Styling Products


Choosing the right styling products can also help you maintain your bangs hairstyle. Look for products that are designed for your hair type and texture, and avoid using too much product, as this can weigh down your bangs and make them look greasy or flat.


The Don'ts:


1. Don't Cut Your Bangs Too Short


Cutting your bangs too short can be a common mistake, especially if you are new to this hairstyle. Your bangs should be long enough to frame your face, but not so short that they are difficult to style. If you are unsure about the length of your bangs, it is best to consult with a professional stylist.


2. Don't Wash Your Bangs Too Often


Washing your hair too often can strip it of its natural oils and cause your bangs to become dry and brittle. Try to limit washing your hair to every two to three days, and use a gentle shampoo and conditioner that are designed for your hair type.


3. Don't Overuse Heat Styling Tools


Using heat styling tools too often can damage your hair and cause your bangs to become dry and frizzy. Try to limit your use of blow dryers, straighteners, and curling irons, and use a heat protectant spray before styling your hair with heat.

In conclusion, maintaining your bangs hairstyle requires some effort and attention to detail, but it is worth it in the end. By following these dos and don'ts, you can keep your bangs looking stylish and healthy for a long time.

How to Transition from Long to Short Haircuts: Tips and Tricks

  No comments    
categories: , , , ,
Deciding to cut off your long locks can be a daunting task. You may have had long hair for years and feel comfortable with it but want to switch things up. Or maybe you're tired of the maintenance that comes with long hair and want to try something new. Whatever your reason, transitioning from long to short haircuts can be a big change. Here are some tips and tricks to help you make the transition with ease.


Start with a Plan


Before you make the chop, it's important to have a plan. Consider what kind of short haircut you want and what will suit your face shape and hair type. Research styles that you like and bring pictures to your hairdresser. They can help you decide what will work best for you.


Gradual Transition


If you're not ready to make a drastic change, try a gradual transition. Start by cutting a few inches off your hair and see how you feel. You can always go shorter later on. This will also give you a chance to get used to styling shorter hair.


Consider Your Lifestyle


Short haircuts require less maintenance than long hair, but they still need care. Consider how much time you're willing to spend styling your hair each day. If you have a busy schedule, opt for a low-maintenance haircut that doesn't require much styling. If you're a gym-goer, choose a style that is easy to manage post-workout.


Accessorize


Short haircuts can be accessorized with hair accessories like headbands, clips, and scarves. These can add a pop of color or interest to your style and make the transition more fun.


Product is Key


To keep your short haircut looking its best, invest in the right hair products. Talk to your hairdresser about what products will work best for your hair type and style. Some essentials include a good shampoo and conditioner, styling products like mousse or gel, and a hairspray to keep everything in place.


Be Confident


The most important tip for transitioning from long to short haircuts is to be confident. Short haircuts can be a big change, but they can also be empowering. Embrace your new style and wear it with confidence. You might just love it!


Conclusion


Transitioning from long to short haircuts can be a bit scary, but with a plan and some confidence, you can make the change with ease. Consider your face shape and hair type, start with a gradual transition, and invest in the right products. With the right short haircut and some added accessories, you'll be rocking your new style in no time.

Bangs Hairstyles for Different Face Shapes: A Comprehensive Guide

  No comments    
categories: , , , ,
Bangs are a great way to add a new dimension to your hairstyle. They can help frame your face, add texture, and highlight your best features. However, not all bangs are created equal - what works for one face shape may not be the best option for another. In this comprehensive guide, we'll explore different bang styles for each face shape to help you find the perfect look.


Round Face Shape


If you have a round face shape, your goal is to add some length to your face. A side-swept bang is a great option, as it creates a diagonal line that elongates the face. Avoid blunt cuts or heavy bangs that accentuate the roundness.


Oval Face Shape


Those with an oval face shape are fortunate, as they can pull off almost any type of bang. A blunt cut or a soft, wispy bang can work well to enhance your features. However, avoid heavy bangs that cover your forehead, as they may make your face appear shorter.


Square Face Shape


For a square face shape, the goal is to soften the angles and create a more rounded appearance. Soft, layered bangs that graze the eyebrows are a great option. Avoid blunt or heavy bangs that emphasize the squareness of your face.


Heart Face Shape


A heart-shaped face typically has a wider forehead and a narrower jawline. For this face shape, a side-swept bang with layers can help balance out the proportions. Avoid heavy, blunt bangs that emphasize the forehead.


Diamond Face Shape


A diamond-shaped face is characterized by a narrow forehead and jawline, with wider cheekbones. To balance out the proportions, go for a side-swept bang with layers that falls just below the eyebrows. Avoid heavy or blunt bangs that emphasize the cheekbones.
In conclusion, choosing the right bangs for your face shape can make a big difference in the overall appearance of your hairstyle. By following this comprehensive guide, you can find the perfect bangs to enhance your features and flatter your face shape.

How to Add Volume to Long Hair: Tips and Tricks from the Pros

  No comments    
categories: , , , ,
If you have long hair, you know that it can be challenging to add volume and keep it looking full and bouncy. Fortunately, there are tips and tricks that can help you achieve the volume you desire. In this article, we'll share some expert advice on how to add volume to long hair.


1. Use a Volumizing Shampoo and Conditioner


One of the easiest ways to add volume to your long hair is to use a volumizing shampoo and conditioner. These products are designed to add body and lift to your hair, making it look fuller and thicker. Look for products that contain ingredients like collagen, biotin, and keratin, which can help strengthen your hair and give it more volume.


2. Blow-Dry Your Hair Upside Down


Blow-drying your hair upside down is a classic trick for adding volume to long hair. To do this, flip your head upside down and blow-dry your hair from the roots to the ends. This will help lift your hair away from your scalp and create more volume.


3. Use Velcro Rollers


Velcro rollers are another great tool for adding volume to long hair. To use them, simply roll sections of your hair around the rollers and secure them in place. Leave the rollers in for a few minutes, then remove them to reveal bouncy, voluminous hair.


4. Try a Root-Lifting Spray


Root-lifting sprays are designed to add volume to the roots of your hair, where it tends to be flatter. To use them, spray the product directly onto your roots and massage it in with your fingers. Then, blow-dry your hair as usual for added lift and volume.


5. Tease Your Hair


Teasing your hair is another classic technique for adding volume to long hair. To do this, take a small section of hair at the crown of your head and backcomb it with a fine-tooth comb. Repeat this process with other sections of hair, then gently smooth the top layer over the teased sections for a seamless look.


Conclusion


Adding volume to long hair is easier than you might think. By using the right products and techniques, you can achieve a full, bouncy look that will turn heads. Try out some of these tips and tricks from the pros to give your long hair the volume it deserves.

How to Transition from Straight to Curly Hair: Tips for a Smooth Change

  No comments    
categories: , , , ,
If you are looking to transition from straight to curly hair, there are some things that you need to keep in mind. While the process may seem daunting at first, it can be done with the right tools, techniques, and patience. In this article, we will discuss some tips for a smooth transition from straight to curly hair.


1. Start with a Haircut


The first step in transitioning from straight to curly hair is to get a haircut. This will help to remove any damaged or split ends and give your hair a fresh start. When getting a haircut, make sure to communicate with your stylist about your desired end result. They can help you to achieve the right length and shape for your new curly hair.


2. Invest in the Right Products


To achieve curly hair, you will need to invest in the right products. This includes a good shampoo and conditioner that are specifically designed for curly hair. You will also need to invest in a styling product, such as a curl defining cream or gel. These products will help to enhance your natural curls and keep them defined throughout the day.


3. Use the Right Techniques


When transitioning from straight to curly hair, it is important to use the right techniques. This includes using a diffuser on your hair dryer to enhance your curls and prevent frizz. You can also use a microfiber towel to dry your hair instead of a traditional towel, which can cause frizz and breakage.


4. Be Patient


Transitioning from straight to curly hair takes time and patience. It may take several months for your hair to fully transition to curly. It is important to be patient and not give up on the process. You may need to experiment with different products and techniques to find what works best for your hair.


5. Embrace Your Curls


Finally, it is important to embrace your new curly hair. Curly hair is beautiful and unique, and it should be celebrated. Experiment with different hairstyles and embrace your natural curls. You may find that you love your new curly hair even more than your straight hair!

In conclusion, transitioning from straight to curly hair can be a fun and exciting process. With the right tools, techniques, and patience, you can achieve beautiful, defined curls. Remember to invest in the right products, use the right techniques, be patient, and embrace your new curls. With these tips, you can make a smooth transition from straight to curly hair.

How to Make Your Messy Bun Look Chic and Stylish

  No comments    
categories: , , , ,
If you are looking for a quick and easy hairstyle that looks effortless and chic, then the messy bun is the perfect choice for you. With just a few simple steps, you can turn your messy bun into a stylish and glamorous hairstyle that will have you looking fabulous in no time.


Step 1: Start with Clean Hair


The first step in creating a chic and stylish messy bun is to start with clean hair. This will help to give your hair the volume and texture it needs to hold the bun in place. If you have oily hair, then you may want to use a dry shampoo or texturizing spray to give your hair some extra grip.


Step 2: Gather Your Hair


The next step is to gather your hair into a high ponytail. Use your hands to smooth out any bumps or lumps in your hair, and make sure that your ponytail is tight and secure. You can also use a hair tie or elastic band to keep your ponytail in place.


Step 3: Create a Messy Bun


To create the messy bun, start by twisting your ponytail around the base of the ponytail. Use bobby pins to secure the bun in place, and make sure that it is positioned high on your head. Once the bun is in place, use your fingers to gently tug at the hair to create a messy, undone look.


Step 4: Add Accessories


To add some extra style and flair to your messy bun, you can add some accessories such as a headband, hair clips, or a scarf. These accessories can help to give your hairstyle a more polished and put-together look.


Step 5: Finish with Hairspray


To keep your messy bun in place all day long, finish off your hairstyle with a light mist of hairspray. This will help to hold your hair in place and prevent any flyaways or frizz.


Conclusion


With these simple steps, you can transform your messy bun into a chic and stylish hairstyle that is perfect for any occasion. Whether you are running errands, going to work, or heading out for a night on the town, the messy bun is a versatile and trendy hairstyle that is sure to turn heads.

5 Chic Updos for Short Hair

  No comments    
categories: , , , ,
If you have short hair, you may feel limited in your styling options. However, there are plenty of chic updos that you can create with shorter locks. Whether you're going to a formal event or just want to switch up your everyday look, these five updos are sure to impress.


1. Braided Crown


The braided crown is a beautiful and elegant updo that works well with short hair. To create this look, start by braiding two small sections of hair on either side of your head. Then, bring the braids up and over the crown of your head, securing them with bobby pins. Finish the look by tucking the ends of the braids under and pinning them in place.


2. French Twist


The French twist is a classic updo that can be adapted for shorter hair. Start by pulling your hair back into a low ponytail, leaving out a small section at the front. Twist the ponytail and bring it up towards the crown of your head, tucking the ends under as you go. Secure the twist with bobby pins, and then twist the front section of hair and pin it back over the top of the twist.


3. Topknot


The topknot is a simple and stylish updo that works well with short hair. To create this look, gather your hair into a high ponytail on the top of your head. Twist the ponytail and wrap it around the base, securing it with bobby pins. For a more textured look, tease the ponytail before twisting it.


4. Messy Bun


The messy bun is a relaxed and effortless updo that can be created with short hair. Start by pulling your hair back into a low ponytail, leaving out a few pieces at the front. Twist the ponytail and wrap it around the base, leaving the ends sticking out. Pull on the bun to create a messy, undone look, and then pin the front sections of hair back over the top.


5. Side Twist


The side twist is a simple and elegant updo that can be created with short hair. Start by parting your hair on one side, and then taking a small section of hair from the front. Twist the section and bring it back towards the crown of your head, securing it with bobby pins. Repeat on the other side, and then tuck the ends of the twists under and pin them in place.

In conclusion, short hair doesn't have to limit your styling options. These five chic updos are easy to create and will have you looking your best for any occasion.

Get the Perfect Cut: A Guide to Long Layered Haircuts

  No comments    
categories: , , , ,
When it comes to achieving the perfect haircut, long layered haircuts are a popular choice for many women. Long layered haircuts provide versatility in styling and can accentuate your best facial features. However, getting the perfect cut can be challenging if you don't know what to ask for. In this guide, we'll go over everything you need to know about long layered haircuts.


What are Long Layered Haircuts?


Long layered haircuts involve cutting the hair into layers, with the longest length at the bottom and shorter layers on top. A good stylist will ensure that each layer blends seamlessly into the next, providing a natural and flowing look. Long layered haircuts can be customized to suit your face shape, hair texture, and personal style.


Benefits of Long Layered Haircuts


There are many benefits to getting a long layered haircut. Firstly, it adds volume and movement to your hair, making it look healthier and fuller. The layers also help to frame your face and accentuate your best features. Long layered haircuts are versatile, allowing you to style your hair in a variety of ways, from loose waves to sleek straight styles.


How to Get the Perfect Long Layered Haircut


To get the perfect long layered haircut, it's important to communicate with your stylist. Before your appointment, gather some inspiration photos and discuss your goals and preferences with your stylist. Here are some key things to keep in mind:


  • Face shape: Long layered haircuts can be customized to flatter your face shape. For example, if you have a round face, longer layers can help to elongate your face.


  • Hair texture: If you have thin hair, shorter layers can help to add volume. If you have thick hair, longer layers can help to reduce bulk.


  • Length: Consider how much length you want to keep. If you want to keep your hair long, longer layers can help to maintain the length while adding movement. If you're looking for a more dramatic change, shorter layers can create a more dramatic effect.


Styling Long Layered Haircuts


Once you've got your long layered haircut, there are many ways to style it. Here are some ideas:


  • Loose waves: Use a curling iron to create loose waves throughout your hair. This style is perfect for casual occasions.


  • Sleek and straight: Use a flat iron to create a sleek and straight style. This look is great for more formal events.


  • Half up, half down: Pull the top section of your hair into a half-up style, leaving the bottom layers loose. This style is perfect for a romantic look.


Long Layered Haircuts with Bangs


Long layered haircuts can also be paired with bangs for a more dramatic look. Here are some ideas:


  • Side-swept bangs: Sweep your bangs to the side for a soft and romantic look.


  • Straight-across bangs: A straight-across fringe can create a bold and edgy look.


  • Curtain bangs: Curtain bangs are longer and parted down the center, creating a face-framing effect.


In Conclusion


Getting the perfect long layered haircut requires communication with your stylist and consideration of your face shape, hair texture, and personal style. Once you've got your haircut, there are many ways to style it, from loose waves to sleek straight styles. Adding bangs can create a more dramatic effect. With these tips, you're sure to get the perfect long layered haircut.

The Best Hair Accessories for Curly Hair: Clips, Scarves, and More

  No comments    
categories: , , , ,
Curly hair can be a challenge to style and maintain, but with the right hair accessories, you can make the most of your natural texture. From clips to scarves, there are plenty of options to choose from. Here are some of the best hair accessories for curly hair.


1. Hair Clips


Hair clips are a great way to add some flair to your curly hair. Whether you want to keep your hair out of your face or just add some visual interest to your look, there are plenty of clip options to choose from. For curly hair, it's best to look for clips that are gentle on your strands and won't cause breakage or damage. Look for clips with a smooth surface or a fabric covering, such as the Goody Ouchless Hair Clips.


2. Hairbands


Hairbands are another great way to keep curly hair out of your face. Look for hairbands that are wide enough to hold your curls without pulling or causing damage. Fabric headbands, such as the Scunci Effortless Beauty Headwraps, are a great option because they won't slip or slide around on your hair.


3. Scrunchies


Scrunchies are a classic hair accessory that work well for curly hair. They're gentle on your strands and won't cause breakage or damage. Look for scrunchies in fun prints or colors to add some personality to your look. The Kitsch Satin Scrunchies are a great option because they're gentle on your hair and come in a variety of colors.


4. Satin Scarves


Satin scarves are a great accessory for curly hair because they help reduce frizz and breakage. They're also a versatile accessory that can be worn in a variety of ways, such as tied around your head or used as a headband. Look for satin scarves with fun prints or colors to add some personality to your look.


5. Hair Combs


Hair combs are a great tool for detangling curly hair. Look for combs with wide teeth that won't pull or cause damage to your strands. The Denman Classic Styling Brush is a great option because it's gentle on curly hair and helps define your curls.
In conclusion, there are plenty of hair accessories that work well for curly hair. From hair clips to scarves, there's something for everyone. When choosing hair accessories for curly hair, it's important to look for options that are gentle on your strands and won't cause breakage or damage. With the right accessories, you can make the most of your natural texture and look great every day.

The Dos and Don'ts of Braided Hairstyles: Expert Advice

  No comments    
categories: , , , ,
Braided hairstyles have been around for centuries and continue to be a popular choice among women of all ages. From simple fishtail braids to complex cornrows, there are countless ways to style braids. However, like any hairstyle, there are certain dos and don'ts that should be followed to ensure a flawless look. In this article, we will provide expert advice on the dos and don'ts of braided hairstyles.


The Dos of Braided Hairstyles


1. Do moisturize your hair before braiding:

Braids can be harsh on your hair, so it is important to moisturize your hair before braiding. Use a good quality hair oil or leave-in conditioner to keep your hair hydrated and prevent breakage.


2. Do protect your edges:

Braids can also be harsh on your edges, so it is important to protect them. Apply a light layer of edge control or gel to your edges before braiding to keep them smooth and prevent breakage.


3. Do choose the right size of braids:

The size of your braids can make a big difference in the final look of your hairstyle. Choose a size that complements your face shape and hair texture. For example, small braids can look great on fine hair, while larger braids can work well on thicker hair.


4. Do take care of your braids:

Once your braids are in place, it is important to take care of them to ensure they last as long as possible. Use a satin scarf or bonnet at night to prevent frizz and breakage, and avoid excessive manipulation or pulling.


The Don'ts of Braided Hairstyles


1. Don't braid too tightly:

Tight braids can cause scalp irritation and lead to hair loss. Ensure that your braids are not too tight and that you can move your scalp freely.


2. Don't leave your braids in for too long:

While braids can last for weeks, it is important not to leave them in for too long. Leaving braids in for extended periods can lead to breakage and damage to your natural hair.

3. Don't use too much hair extension:

Using too much hair extension can make your braids too heavy and cause scalp tension. Use the right amount of hair extension to ensure that your braids are comfortable and not putting too much stress on your scalp.


4. Don't forget to wash your hair:

Just because your hair is braided doesn't mean you should neglect it. You should still wash your hair and scalp regularly to keep it clean and healthy.
In conclusion, braided hairstyles can be a great way to switch up your look and protect your natural hair. However, it is important to follow the dos and don'ts to ensure a flawless and healthy look. Remember to moisturize your hair, protect your edges, choose the right size of braids, and take care of your braids. Avoid braiding too tightly or leaving your braids in for too long, using too much hair extension, and neglecting to wash your hair. With these tips, you can rock braids with confidence and style.

From Fishtails to Dutch Braids: The Best Braided Hairstyles for Long Hair

  No comments    
categories: , , , ,
Long hair is a blessing, but it can also be a challenge to manage. When it comes to styling, braids are a great option that not only look beautiful but also help keep the hair tangle-free. In this article, we will explore some of the best braided hairstyles for long hair.


Fishtail Braid


The fishtail braid is a classic style that looks great on long hair. This braid is created by splitting the hair into two sections and crossing small sections of hair from one section over to the other. The fishtail braid looks intricate, but it's actually quite simple to create.


Dutch Braid


The Dutch braid, also known as the reverse French braid, is another popular style for long hair. This braid is similar to a French braid, but instead of crossing the sections of hair over the top, they are crossed underneath. The result is a braid that looks like it's popping out of the hair.


Waterfall Braid


The waterfall braid is a beautiful and romantic style that's perfect for long hair. This braid is created by dropping small sections of hair as you braid, creating a cascading effect. The waterfall braid is perfect for a special occasion or a romantic evening out.


Milkmaid Braid


The milkmaid braid is a timeless style that's perfect for long hair. This style involves braiding two sections of hair on either side of the head and then crossing them over the top of the head. The result is a beautiful braided crown that looks elegant and sophisticated.


French Braid


The French braid is a classic style that looks great on long hair. This braid is created by crossing small sections of hair over each other, gradually adding more hair as you go. The French braid is a versatile style that can be worn for a casual day out or a formal event.

When it comes to braided hairstyles for long hair, the options are endless. Whether you prefer a classic style like the French braid or a more intricate style like the waterfall braid, there's a braided hairstyle out there that's perfect for you. Experiment with different styles and find the one that makes you feel confident and beautiful.

How to Achieve the Perfect 1920s Flapper Hairstyle

  No comments    
categories: , , , ,
The 1920s were known for their iconic fashion styles, with flapper hairstyles being one of the most popular trends of the time. This hairstyle is characterized by its short bob and waves, and is still a popular look for many women today. In this article, we will provide you with a step-by-step guide on how to achieve the perfect 1920s flapper hairstyle.


Step 1: Preparing Your Hair


Before starting, it is important to make sure your hair is clean and dry. Although this hairstyle can work on any hair type, it is recommended to have hair that is shoulder length or shorter. Once your hair is ready, apply a small amount of hair gel or mousse to help hold the waves in place.


Step 2: Creating the Waves


To create the iconic waves of a flapper hairstyle, you will need a curling iron with a 1-inch barrel. Starting at the nape of your neck, curl small sections of hair inwards towards your face. Hold the curling iron in place for about 5-10 seconds, then release and gently tug on the curl to loosen it up. Continue curling and tugging until all sections of your hair have been styled.


Step 3: Cutting Your Hair


In order to achieve the classic flapper bob, you will need to cut your hair to the appropriate length. A flapper bob typically falls just below the chin, with short layers in the back. If you are not comfortable cutting your own hair, it is recommended to visit a professional hairstylist.


Step 4: Styling the Front


To complete the flapper look, you will need to style the front of your hair. This can be done by creating a deep side part and sweeping the longer section of hair across your forehead. You can also add a decorative hair accessory, such as a headband or feather clip, to complete the look.


Step 5: Finishing Touches


To ensure your flapper hairstyle stays in place throughout the day, finish with a spritz of hairspray. This will help hold the waves and prevent any frizz or flyaways.
In conclusion, achieving the perfect 1920s flapper hairstyle is easy with these simple steps. By following these instructions, you can create a classic and timeless look that will turn heads wherever you go.

How to Choose the Right Long Layered Haircut for Your Lifestyle

  No comments    
categories: , , , ,
When it comes to haircuts, long layered haircuts are one of the most popular choices among women. Not only do they add volume and movement to the hair, but they also provide versatility in styling. However, choosing the right long layered haircut for your lifestyle can be a daunting task. In this article, we will provide some tips on how to choose the perfect long layered haircut that suits your lifestyle.


Consider Your Face Shape


The first step in choosing a long layered haircut is to consider your face shape. Different face shapes suit different haircuts. For example, if you have a round face, long layers can help to elongate your face and create the illusion of a slimmer face. On the other hand, if you have a square face, you may want to consider long layers with soft edges to soften the angles of your face.


Think About Your Hair Type


Another important factor to consider when choosing a long layered haircut is your hair type. If you have fine hair, long layers can help to add volume and movement to your hair. However, if you have thick hair, too many layers can make your hair look frizzy and unmanageable. In this case, longer layers with minimal layering can help to create a sleek and manageable look.


Consider Your Lifestyle


When choosing a long layered haircut, it's important to consider your lifestyle. If you have a busy schedule and don't have much time to style your hair, a low maintenance and simple long layered haircut may be the best option for you. On the other hand, if you have more time to style your hair and want a more dramatic look, you may want to consider a long layered haircut with more layers and volume.


Consult with Your Stylist


Lastly, it's important to consult with your stylist when choosing a long layered haircut. Your stylist can provide expert advice on what haircut would work best for your face shape, hair type, and lifestyle. They can also give you tips on how to style and maintain your haircut so that it looks great every day.

Choosing the right long layered haircut for your lifestyle can be a fun and exciting process. By considering your face shape, hair type, lifestyle, and consulting with your stylist, you can find the perfect haircut that suits you. With the right long layered haircut, you can look and feel your best every day.

The Best Protective Hairstyles for Black Women

  No comments    
categories: , , , ,
When it comes to maintaining healthy hair, protective hairstyles are a must for black women. These hairstyles not only protect the hair from environmental damage but also help to retain moisture and prevent breakage. In this article, we will discuss some of the best protective hairstyles for black women.


Braids


Braids are a classic protective hairstyle for black women that never goes out of style. Not only do they look great, but they also help to protect the hair from the harsh elements. There are many different types of braids that you can choose from, including box braids, Senegalese twists, and cornrows.
If you are looking for a low-maintenance protective hairstyle, then braids are a great choice. They can last for several weeks and require minimal styling. However, it is important to remember to take care of your hair while it is in braids by moisturizing and cleansing your scalp regularly.


Twists


Twists are another popular protective hairstyle for black women. They are similar to braids, but instead of weaving the hair, the hair is twisted together. Twists can be done with or without extensions and can last for several weeks.

Twists are a great protective hairstyle for those who want a more natural look. They can be styled in various ways, such as updos or ponytails, and can be accessorized with beads or clips.


Crochet Braids


Crochet braids are a protective hairstyle that involves weaving hair extensions into the hair using a crochet hook. This hairstyle is popular because it is easy to do and can be done in a variety of styles, such as twists or braids.

Crochet braids are a great protective hairstyle for those who want a versatile look. They can be styled in many different ways and can be worn for several weeks.


Bantu Knots


Bantu knots are a protective hairstyle that involves twisting the hair into small knots. This hairstyle is great for those who want to protect their hair while also having a stylish look.

Bantu knots are a great protective hairstyle for those with natural hair. They can be styled in many different ways, such as updos or half-up half-down styles, and can be accessorized with beads or clips.


Conclusion


In conclusion, protective hairstyles are a must for black women who want to maintain healthy hair. There are many different types of protective hairstyles to choose from, including braids, twists, crochet braids, and Bantu knots. It is important to remember to take care of your hair while it is in a protective hairstyle by moisturizing and cleansing your scalp regularly.
Remember, the key to maintaining healthy hair is to protect it from damage and to keep it moisturized. By choosing the right protective hairstyle and taking care of your hair, you can have healthy, beautiful hair all year round.